What to Expect
🕘 Reading time =30 minutes
By the end of this guide, you’ll be able to understand what multi-tenancy and partitioning are, how to set them up on Smile CDR and how to achieve multi-tenancy using partitioning.
Background
Partitioning allows each resource on the server to be placed in an arbitrary identifier group, known as a partition. This can be used to achieve multi-tenancy, where multiple logically separate pools of resources exist on the server. Traditionally, this kind of setup is desired when each of these pools belong to a distinct group/organization/customer/etc... known as a “tenant.” Each of these tenants should not be able to access or modify data belonging to another tenant.
Objective
This document will provide a step-by-step procedure of how to set up and implement Multi-Tenancy via Partitioning in Smile CDR. One should be able to successfully complete the setup with little to no technical background of either concepts.
Prerequisites
The following items/knowledge are required:
-
Smile CDR installed. If not, see the following document on installing and configuring Smile CDR.
Instructions
Note: the instructions remain the same between Windows & Mac Operating systems.- Start your instance of Smile CDR, next open your web admin console
- On the left side panel, navigate to the “fhir_endpoint” module and set Tenant Identification Strategy to URL_BASED
- Save the configuration and restart the Module
- On the left hand side panel, navigate to the “Persistence module” used for the FHIR Storage Module. Click Yes for the “Partitioned Enabled” and “Partition Select Mode”
Configuration
Sample Value
Description
Partition Enabled
YES
Enable data partitioning: if this isn’t enabled, all other settings in this category are ignored. FHIR Storage Partitioning can be used to logically segregate data into distinct logical pools. See Partitioning for more information on this feature.
Partition Select Mode
REQUEST_TENANT
Determines whether the request partition selection is determined from the incoming request in the FHIR Endpoint module.
- Save the configuration and restart the Module
Note: upon startup, the system will always create a single partition with an ID of 0 and a name of “DEFAULT.”
Note: once multitenancy is enabled, all requests to the FHIR server must contain a tenant name in the URL. These operations are no exception. If you fail to include a tenant identifier in the request, an error will be returned. - Let’s try creating additional partitioning from Postman/Insomnia. To do so, POST the following request. This POST will create a partition with the Tenant name “PARTITION-123”
POST http://localhost:8000/DEFAULT/$partition-management-create-partition
{
"resourceType": "Parameters",
"parameter": [
{
"name": "id",
"valueInteger": 123
},
{
"name": "name",
"valueCode": "PARTITION-123"
},
{
"name": "description",
"valueString": "a description"
}
]
} - Now let’s POST a patient from Postman/Insomnia using the following request. Notice that the tenant is mentioned in the request URL. The below code should be posted in the body of the URL:
POST http://localhost:8000/PARTITION-123/Patient
{
"resourceType": "Patient",
"meta": {
"versionId": "1",
"lastUpdated": "2020-11-10T20:24:48.194+00:00"
},
"name": [
{
"text": "Peter Parker",
"family": "Parker",
"given": [ "Peter","Spiderman" ],
"prefix": ["mychange"]
}
],
"gender": "male",
"birthDate": "1994-07-24"
} -
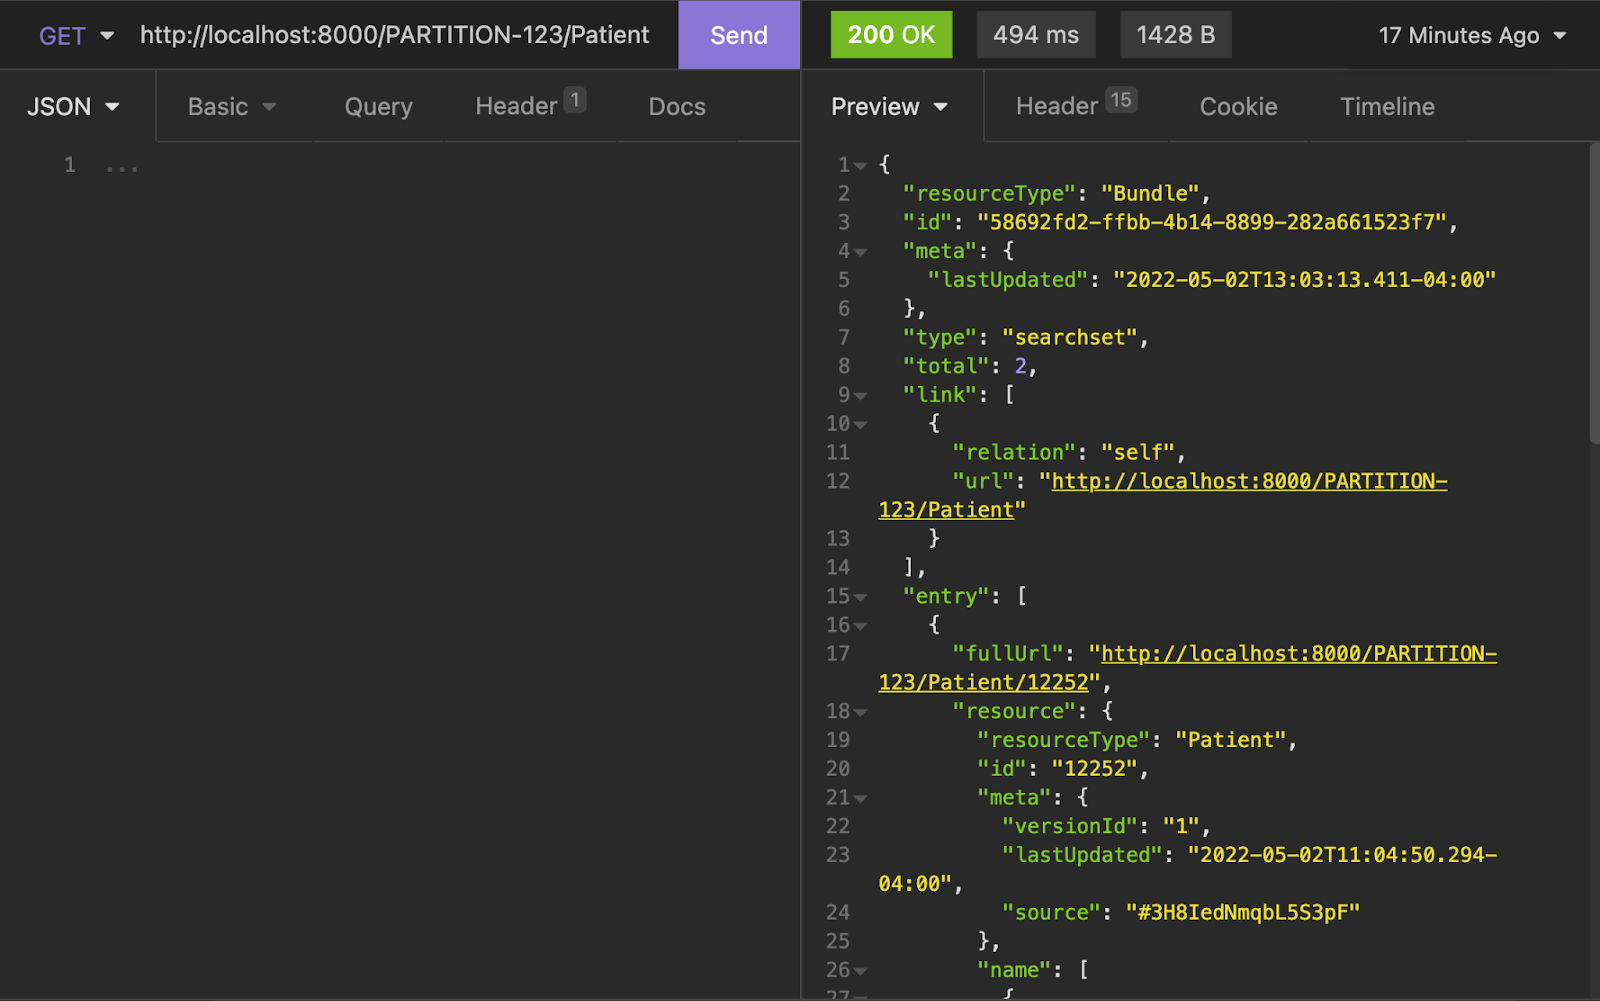
The partition created can be accessed by using the GET request in Postman/Insomnia. This will allow you to see the patients within the partition we created. An example of the response to this request is provided below: